Monday, February 18, 2013

Bluegrass Yakmasters

This is going to be an extremely exciting year for kayak fishing in Kentucky, and it will largely be due to the formation of a new club that goes by the name of Bluegrass Yakmasters. I began hearing rumors of these guys back in the fall. My Dad messaged me one day and told me to look them up on Facebook, a bunch of guys he works with had been talking about them. I looked them up and did the usual "Like", but didn't see much activity until closer to the end of the year. They had apparently just went official and were in the process of pulling together sponsors and a 2013 tournament schedule, and they definitely did not disappoint.

One of the major sponsors is HOOK1. HOOK1 has quickly become one of the leaders of the kayak fishing movement, providing all of the most highly sought after and sport specific products that kayak fishermen are looking for. What impresses me most about HOOK1 is their customer service and overall presence in the sport of kayak fishing. I've dealt with them several times when ordering accessories for my boat, and will be placing an order here soon for a new boat for my wife. I directed several of my buddies to HOOK1 for their needs, and one of them was especially impressed just lately with how quick they received their brand new "Knot Right Camo" Wilderness Systems Ride 135. 13 hours from order to receiving their boat at a local shipping hub! (It should be noted though, that this time can vary according to your shipping location. It helps that in this instance, the boat was going from TN to KY, but the 13 hour time frame was still impressive regardless. It takes most places 24 hours just to process an order, much less ship it out, so this is still an impressive feat!)

Chad Hoover, the frontman of HOOK1, is basically everywhere. When he's not filming episodes of KayakBassinTV, he's in the HOOK1 shop answering phones and taking orders, or he's out fishing or attending trade shows. In all fronts, Chad and the rest of the HOOK1 crew have been great advocates for kayak fishing, and is recognized by many as being one of the driving forces in bringing more visibility and interest to the sport.

Other sponsors lined up for the Bluegrass Yakmasters include Shimano, Hobie Fishing, NuCanoe, Kayak Angler Magazine, Cabin Creek Bait Company, BullfrogBaits.com, Logic Lures, Power Team Lures, Bending Branches, NRS, The Rod Glove, and ALE81. It's especially exciting to see some of the local companies such as Bullfrog Baits and Cabin Creek Bait Company on there. Those guys make some great baits and it'll be great to see some local places get more exposure.

I'm also very happy to see NRS and Bending Branches step up as a sponsor. I've used NRS for years as my go-to supplier of whitewater gear, and I LOVE my Bending Branches Angler Classic paddle (check out my review HERE). It's also impressive to see a big company such as Shimano step up as a sponsor. It goes to show, these guys mean business!

Now that we're done giving some much deserved credit to the sponsors, lets talk about the 2013 tournament schedule for the Yakmasters! There are several locations on the schedule that most people are familiar with or have at least heard of. Lake Cumberland and Green River Lake are well known for their quality of fishing, but I'm even more excited to be fishing the Elkhorn Creek and Cedar Creek Lake. The Elkhorn is quickly becoming THE go-to spot for smallmouth bass fishing. It's been proclaimed by many as the best creek in the state, if not the nation, for smallmouth bass fishing.

Cedar Creek Lake is quickly becoming one of the premier lakes for bass fishing. It was built with the sole purpose of being a trophy bass lake, and is already popping up on the radar as one of the top bass fishing lakes in the US, coming in at number 30 in the 2006 Field and Streams list of “The 35 Best Bass Fishing Waters in the U.S.” To give you an idea of just how impressive this achievement really is as well as how well this lake has been managed, Cedar Creek was impounded in 2003. It took just 3 YEARS to make the list as one of the best, and it's only gotten better since! I will be posting a completely separate article on Cedar Creek soon with more info and recent pictures/videos of this impressive body of water.

Here's the official 2013 Tournament Schedule for the Bluegrass Yakmasters, as copied from their Facebook page.

--- April 6th, 1st Annual Bluegrass YakMasters Open Tournament @ Cedar Creek Lake For the following 'Qualifying' events, participants must be a registered club member
--- April 27th @ Lake Cumberland
--- May 18th @ Green River Lake
--- June 8th @ Elkhorn Creek*
--- June 22nd @ Stoner Creek
--- July 27th @ S. Fork of the Licking River
--- August 10th @ Elkhorn Creek*
--- August 24th @ Beaver Lake
--- September 28th @ Guist Creek Lake
--- October 26th & 27th Bluegrass YakMaster Classic Championship @ Cedar Creek Lake+
* Tournament will be joined with the Elkhorn Creek Fishing Series, and will be open to the N. Fork, S. Fork, and Main Stem.
+ To fish in the Classic Championship, club members must participate in 5 of 8 Qualifying events.
For the coveted Angler of the Year Title and healthy prize package members will be trying to earn as many points as possible through the season. Members will receive 'Participation Points' for every event they fish. Members will also receive 'Placement Points' for how well they finished. Anglers can count all 'Participation Points' but only their best 5 'Placement Points' toward that total.
We will factor in water and weather conditions before each event to ensure safety of our participants.


One other thing that has been announced on the Bluegrass Yakmasters facebook page, is the raffle that will be after the 1st Annual Bluegrass Yakmasters Open Tournament on April 6th...
"BIG Announcement: We are going to have a raffle after the open. The Grand Prize will be a Wilderness Systems Ride 115 rigged by Chad Hoover of HOOK1. http://www.wildernesssystems.com/product/index/angling/angling_kayaks/ride_angler_2012/ride_115_angler_2012/ You can purchase tickets 1 for $10 or 3 for $25. Additionally if you sign up as a member at or before the open you will receive 1 ticket as well! Everyone has a chance to win this and other great prizes but you must be present to win!!! "


As I mentioned above, I'll be writing another post exclusively on Cedar Creek Lake, but I'll also be writing periodically on some of the other locations listed on the tournament schedule.  It's going to be a big year for kayak fishing here in Kentucky, so you'll definitely want to stay tuned...maybe even come out and fish with us!  The 1st Annual Open Tournament on April 6th already has 43 people listed as "going" on its facebook page, with well over 50 expected to register, it's going to be a huge event!  Click HERE to check out the Bluegrass Yakmasters, and HERE to check out the 1st Annual Bluegrass YakMasters Open Tournament.

See you on the water!

Wednesday, August 29, 2012

DIY First Aid Kits, Sort Of...

As with all adventures, you need or should be prepared for everything. Many things get overlooked or forgotten. They're usually seemingly little things that are negligible or trivial in nature, that is until you need them the most. Two of the most common are toilet paper and first aid kits. For now though, we'll discuss first-aid kits.

I looked through the whole gamut of first-aid kits, from the expedition kits for 5 or more people, to little kits that one would normally find at a dollar store. I was never quite satisfied with what I found, so I opted to create my own. I should probably start off with saying that when it comes to going on a full on expedition with a few other people and staying for a few days or longer, one of the expedition kits provided by Adventure Medical Kits would actually serve quite well. The majority of my trips are overnighters or days trips, so I didn't really need quite that many supplies. The problem is that in some of the smaller kits made for overnighters or day trips, they just have the bare bones bandaids and alcohol wipes.

Given all of that, when creating my own I started with a small kit. I used a small premade kit mostly for the handy little zipper case, then crammed some more stuff in there. I started with a little Coghlan's Trek I that you can buy from Walmart or any outdoors store. It only had the typical little bandaids, medical tape, and alcohol wipes. Hopefully that's all you will ever need, but we don't usually plan our accidents around hopes. If we did, we would obviously never have them in the first place. The good thing about the little Trek I pouch is that it had plenty of room for more supplies. I opted to pack it with a few other supplies just in case.
1. Mirror for signaling and self-checking any facial wounds
2. 2 Gauze pads for more serious abrasions and cuts
3. 2 Knuckle bandaids, I will probably double that to 4 since knuckle abrasions and cuts are the most common for me.
4. 2 Fingertip bandaids, I will also probably double these to 4 since fingertip cuts are also common.
5. An assortment of several medium and small bandaids, as well as several of the little wound closure strips (the technical name escapes me for some reason)
6. A moleskin for blisters, which has saved my toes more than once!
7. Athletic or medical tape, for helping secure bandaids or gauze pads.
8. An assortment of peroxide and alcohol wipes
9. A couple packets of sting relief, not really needed, but very welcome.


I also carry a small bottle of basic pain relievers and allergy meds separately, but make sure you or the people in your group aren't allergic to any of these meds. All of this stuff packs into my little first aid pouch quite well and it's still small enough to hold in the palm of my hand. I simply stick it in one of my drybags or usually in a spare pocket in my tackle bag. I've only had to use mine a couple times, but I've always had what I needed to at least take care of small injuries until I can get out of the backcountry. In the event of bigger injuries, I can usually improvise with objects around me to create what I need to stabilize an injury then control the bleeding (if there is any) with the assortment of bandages in my little kit. These skills were learned in a certified wilderness first-aid course, which I very highly recommend!

That's basically it for my little kit that I carry 90% of the time. If you're looking to put your own together or purchase one straight off the shelf, do your research and read up on the various products reviews out there, then get out there and take a first aid course. Hopefully you'll never need to use what you've learned, but you never know what will happen. Be safe and go prepared!

Friday, August 17, 2012

DIY Kayak Scupper Plugs

As most may notice, a large majority of SOT kayaks have scuppers. If you're not sure what a scupper is, it's essentially a hole (or set of holes) intentionally molded into a sit-on-top kayak that allows water to drain out. They're especially useful if it's raining or when you take on water when running a rapid. They're not so useful when you're on flatwater and they allow a little water into the boat or in my case, foam build up from whatever "nutrients" might be in the water. The scuppers in the rear tankwell of my Ride 135 take on a little bit of water when I have my seat slid all the way back, which effectively soaks some of my tackle. It's not a huge deal, but it can be annoying on flatwater. Thus, enter the scupper plugs...

There are factory and aftermarket made scupper plugs that will fit virtually every SOT kayak out there, but they can get kind of pricey, especially when you're having to buy 6 or 8 of them to keep your boat completely dry on-deck. I opted to do it my own way. There are a variety of ways to make your own scupper plugs. You can carve out pieces of a foam yoga block, a big piece of packing foam, pool noodles, etc. I opted to use foam practice golf balls. They're cheap, easy to cram in the scuppers, stay put pretty well, and they work just as good as a conventional purpose-made scupper plug. They typically run around $5 for a pack of 12, so it's a cheap and easy mod to do that will keep you and your boat dry on flatwater.

Check out the video for more info...

Friday, August 10, 2012

Quick and Easy DIY Mount for a Humminbird PiranhaMax 160 Fish Finder

Once I got the initial setup on my boat with all of the rod holders and anchor trolleys, I contemplated adding a fish finder. A lot of people out there choose not to add a fish finder to their fishing kayak, mostly because they fish rivers and a fish finder is of little use and just gets in the way. Fish finders will work ok on larger rivers, but for many it's just not worth the trouble. My goal was to make it as little trouble as possible. I fish a lot of smaller lakes and reservoirs, and it would be nice to at least see the depth and temperature of the water I'm fishing in. Finding actual fish is a nice perk as well...

I opted to go with the Humminbird PiranhaMax 160 that AustinKayak.com carries. It has a dual-band transducer for 20 and 60 degree angle readings, allowing a good wide view of what's below you. It also has a very nice backlight and is waterproof. I'll get around to posting an in-depth review soon of the PiranhaMax 160, but I was once again impressed by ACK's prices, shipping, and customer service. They're actually one of the few retailers I trust that carry the 160 (most others only carry either the 150 or the 170 for some odd reason). I considered the 160 a steal for $90 shipped, especially given the dual band transducer, backlight and weatherproofing. I didn't want to go with something too expensive, mostly because I only really needed basic functionality for now. I may change my mind sometime in the future as I fish more lakes and really get to researching thermoclines, but the little 160 fits my needs perfectly for now.

I wanted to mount my recently purchased PiranhaMax 160 in a way that it was easily removable for when I do not want it or need it on river and creek trips. I researched a few ways to mount it by purchasing adapters for a rod holder base, but in the end I decided to make my own. The total cost? About 50 cents.

I was going to purchase a mount made specifically for the Piranhamax series by Scotty, which is very nice, but it didn't have the option of routing the cables through the actual mount, which is ultimately what I wanted. I was then going to do the same as Paul from Palmetto Kayak Fishing and make a custom mount base like his, but it also wasn't designed to have the cables routed through the mount.

I decided to start with a Scotty Flush Mount Bracket, which has a nice low profile and a plug that you can remove from the bottom for, in my case, routing cables. I still wasn't sure how I was going to interface the base of the fish finder to the flush mount bracket, until I got to peering at the bottom of the fish finder's base. As it turns out, below the hole in the base of the fish finder, there is a 1/2-1/4" long tube or shaft that extends down. The circumference of that little tube appeared to be the same as the outer circumference of 1/2" PVC. I tried a 1/2" PVC coupler and it fit perfect! Snug enough that it takes a pretty good grip to pull it back off, but one could probably secure it with a little GOOP or Lexel for added security. I then cut a small piece of 1/2" pvc (maybe 2.5 to 3 inches long) to go in the other end of the coupler, long enough to fit in one end of the coupler and extend down into the bottom of the Scotty flush mount bracket.


Uploaded from the Photobucket iPhone App

Uploaded from the Photobucket iPhone App


As evident from the pictures, I painted it gloss black (the visible portion anyways) to give it a nice sleek look that matched the fish finder and flush mount. The 1/2" pvc fits down into the flush mount base perfect. It has a little "play" at first, but once you work it past the notch that's down in the flush mount bracket, it locks in pretty decent with enough resistance to keep it from moving around or falling out if you happen to flip your boat. As an added measure of security, I may eventually drill a small hole through both the pvc shaft and the shaft of the flush mount big enough to put a small lynch pin or PTO pin through. Keep in mind that if one does go with that method of securing their fish finder to the base, pull the cables before you drill the hole, then push them back through after drilling, and use a small enough pin that won't pinch the cables when you push it through to lock it all in place.


Uploaded from the Photobucket iPhone App


Once everything was secured, I routed my transducer and power cables up through the base and plugged them into the PiranhaMax 160. [Pro-Tip: Run the transducer cable up first, then the power cable] When I'm not using the fish finder, I simply pull the cables back down into the hull and secure them with a twist tie, then flip the rubber cap down on the flush mount to keep water out or stick a Scotty rod holder in there.

I'm currently working on creating a waterproof battery box, to power my fish finder and a few other accessories that I plan on adding on later. The box will be secured in the center of the hull between the two "towers" formed by the scupper holes (Ride 135 owners will know what I'm talking about. As for the transducer, I opted to "glass" it to the hull using a carved out foam block and some Lexel. I'm not sure how I'll like the transducer mounted like that though. I've heard it has no signal loss, but it does throw the water temp reading off a bit. If it becomes a huge issue, I'll opt for a flip down transducer mount. For now though, this setup should work ok for me, now I just need to get it on the water and try it out this weekend!

More pictures

Uploaded from the Photobucket iPhone App

Friday, August 03, 2012

New Phase 3 AirPro Elevated Seat for the Wilderness Systems Ride Series

This just in from the 2012 Outdoor Retailer Show.. Looks like the rumors were true, this will be really boost the Ride series! A higher seat will give you a better vantage point when fishing as well as make it easier to stand and sit. For those wondering about the stability with a slightly higher center of gravity, the Ride series is so stable it shouldn't even be an issue. This is just a prototype in the video, so it should be interesting to see if they do any more modifications before it's released to the public. Check out Chad Hoover's quick overview in the video below.

Wednesday, August 01, 2012

2012 Astral Buoyancy Ronny PFD Review

This is another part of my latest series of reviews. Several people have asked me about my gear and why I chose what I did. Being a convert from whitewater boating, I started completely new with kayak fishing, so pretty much all of my gear other than my rods and tackle are brand new (I have fished in a bass boat for many years). I did countless hours of research to make sure I was getting the best deal and the best product for my money. I didn't go with the highest end gear for everything, simply because it's not necessary for me. The products I did pick though were what I deemed the best bang for my buck, and none of them have let me down so far.

As far as my PFD goes, I knew it would be difficult to find another pfd (life jacket) as comfortable as my old Lotus Lola, which my wife now uses. As mentioned before, I did quite a bit of research, mostly looking through reviews and message boards. The product that seemed to stand out the most for my specific application of kayak fishing, appeared to be the Astral Ronny, so I bought one to try out. I was not disappointed.

This is by far the most comfortable PFD that I've ever had the pleasure of wearing. It's completely adjustable from the shoulder straps to the side straps. The back panel of foam is only 1/2" thick, so it's extremely comfortable when leaning against a full backrest such as the one on my Ride 135. There's no big chunk or wad of foam making you feel awkward or uncomfortable, which is a very welcome change. The back panel also has a small vent in it to keep the air flowing a bit better. I'm not sure how much it really helps, but it looks cool and I feel cool, so that's pretty much all that matters to me.

The Ronny has one front pocket made out of mesh that I use to hold my Gerber EZ-Out knife and glasses strap. It's not a very big pocket, but would at least fit a cell phone in a waterproof case or similar.

Overall, I am very impressed with this PFD and will certainly keep on using it for quite a while. While I am satisfied with this PFD, especially for the price it typically goes for, there are a few things that I would like to see either changed on this model or possibly for a future creation. I'd like to see thicker fabric such as 400 or 500D nylon. The nylon on the current Ronny seems tough enough as-is, and it dries out super quick, but I'd just like to have a tad tougher material. I'd also like to see another pocket or two on the front for additional gear. This is where if they did take that into consideration, it might be for a completely new model made specifically for fishing, but still keep the 1/2" thick back panel. That's pretty much it! As I mentioned before, I'm very happy and look forward to using this PFD for many seasons to come.

Check out the video below for a quick look and basic overview. Comment with any questions, thanks!

Wednesday, July 25, 2012

2012 Wilderness Systems Ride 135 Review

I've been shopping around for a new kayak for a while now. I've always been into fishing, but it's either been from our bass boat or the bank. The kayak fishing scene has blown up over the last few years, so I wanted to see what all the fuss was about. My first attempts were a little frustrating, mostly because I was attempting to fish from a whitewater crossover or hybrid boat that you sat in and used a bungee skirt. It was a 10' long boat, but due to the sit-in nature of it, it just didn't have the storage, freedom, and flexibility that I wanted and needed for fishing. Enter the sit-on-top options...

There are dozens of sit on tops out there, available for all shapes and sizes, in all sorts of colors and options. Most seem to be pretty good, and about every high end or reputable kayak brand out there has at least a couple models of SOT's in their lineup. Some are better for fishing than others. Some are better for standing up. Some are better for sitting down. Some are a great combination of many factors, and that's why I chose the Wilderness Systems Ride 135. I was VERY strongly considering another boat from a competing company, but the combination of features, size, price, and stability put me in favor of the Ride 135.

I am no small guy by any means. I'm 6'4" and around 300lbs, I needed a good boat that would be stable and track well for flatwater but still be maneuverable in moving water such as on rivers. I can stretch out completely on this boat and still have plenty of room. I'm not exaggerating when I say that I believe guys up to 7' tall or possibly even taller, would have no problem fitting in this boat. The seat and footpegs are adjustable to get your front to rear trim fine tuned, and there is infinite adjustment in the seat for the backrest and leg lifters. The Phase 3 seating is one of the most comfortable seats that I've ever had the pleasure of sitting in. While sitting in the Ride 135, it feels very solid with none of that tippy feeling you get from some other boats. I did briefly try standing in it, and although it felt a little sketchy at first, I can see myself getting used to it very quickly. Finally, a kayak that the big boys can stand in!

Storage is very impressive on this boat as well. With the large hatch up front and medium hatch mid way back, there is plenty of room to store all of your gear. With proper gear management and packing, you could stick a weeks worth of gear and supplies in this boat, with room to spare. I use the left side of the hull as my rod storage when I'm driving to and from the lakes or rivers. It keeps them out of sight from the prying eyes of potential thieves as well as protected from any bugs or road grime. It's very easy to stick at least 4 or 5 rods down the side of the hull when going in from the front hatch. One could stick several more down the other side as well. There is no real limit as far as size goes either. There is at least 11-12' of space, so all of my 6'6" and 7' rods are in no danger. The hatches have rubber and foam seals, so water seepage shouldn't be a big issue.

The color of this boat is my favorite of all the boats I've looked at. Almost everyone offers a camo color, but Wilderness Systems really pulled it off the best. At 88 lbs, the weight of the boat is pretty heavy but you have to take into account that it is 13'6" inches long and nearly 32" wide, it's not going to be light by any stretch...nor should it be. I'm going to be paddling this boat on lakes, rivers, and creeks. It's going to encounter a few bumps along the way, I want the plastic thick enough to handle it, and it is. Despite the heft and length, this boat is still reasonably maneuverable, which is important in moving water. While being maneuverable when you need it to be, it tracks really well on flatwater, requiring very little corrections to keep it moving straight ahead.

The Ride 135 has a bunch of little features too that are particularly handy and really prove that a lot of thought has been put into this boat. Features such as loops inside the hatches to lash gear to, recesses for smaller items in the cockpit, self draining in the recesses, cup holders, and hatch rims, a paddle holder on the side and the front deck, bungee disconnects in the rear tankwell for proper fitment of a crate or other large pieces of gear, bungees on the back of the seat to keep it from flipping down when you stand up, flat areas for Scotty and Ram mounts, pre routed cable housing for the optional rudder system, etc.

The only thing I would like to see is the availability of an add on lock cylinder for the hatches. It would be great to be able to lock them. Granted, it's a plastic boat (albeit a ridiculously thick and tough one), a persistant thief could break into it with a saw if they really wanted to, but it would just add that little bit of extra security when sitting unattended on top of your vehicle or at the put in when you go take a leak or something.

Overall, I'm VERY happy with this boat and I got an absolutely screaming deal on it through AustinKayak.com with free shipping. I normally do try to get my gear local and support my local outfitters, but I couldn't find this particular boat anywhere reasonably close to my home, so I opted to have it delivered. It was shipped via freight to my workplace, so I wasn't expecting it to arrive for at least a week or so, but it only took 5 days! It was packed extremely well by the guys at ACK, so there were no bumps or scratches from shipping.

Check out the videos below for a visual walkthrough. I was only going to do one video, but decided to do another to cover a few more features a little more in depth.

Tuesday, December 13, 2011

A Little Foamie Fun: Part I

Taking some inspiration from the people over at FoamieFun.com and the creators of Foam Boater: Keep It Between The Land, I've decided to try my hand at making a couple foamies. For those of you who aren't familiar with foamies, at least the ones I'm referring to, they are essentially miniature kayaks carved out of foam or wood with some weight in the bottom to keep them upright. They almost always have a daring kayaker attached to them as well. They're designed to float and run just like the big boys, only you can play with them in a little creek. They're made in different sizes as well, running from 6 inches to 15 inches long. The foamies that I will be making are going to run around 8-8.5 inches long, perfect for most little creeks and whatnot around the farm.

Obviously, these are toys, but they're meant for all ages. They're also especially good at making you (or me in this case) look like an enormous dork, but since when has kayaking in general been a very flattering sport?

Anyhow, I'm going to post up a three or four part series on how to make one, paint it, and tune it to run the gnar with confidence. Here is part one...

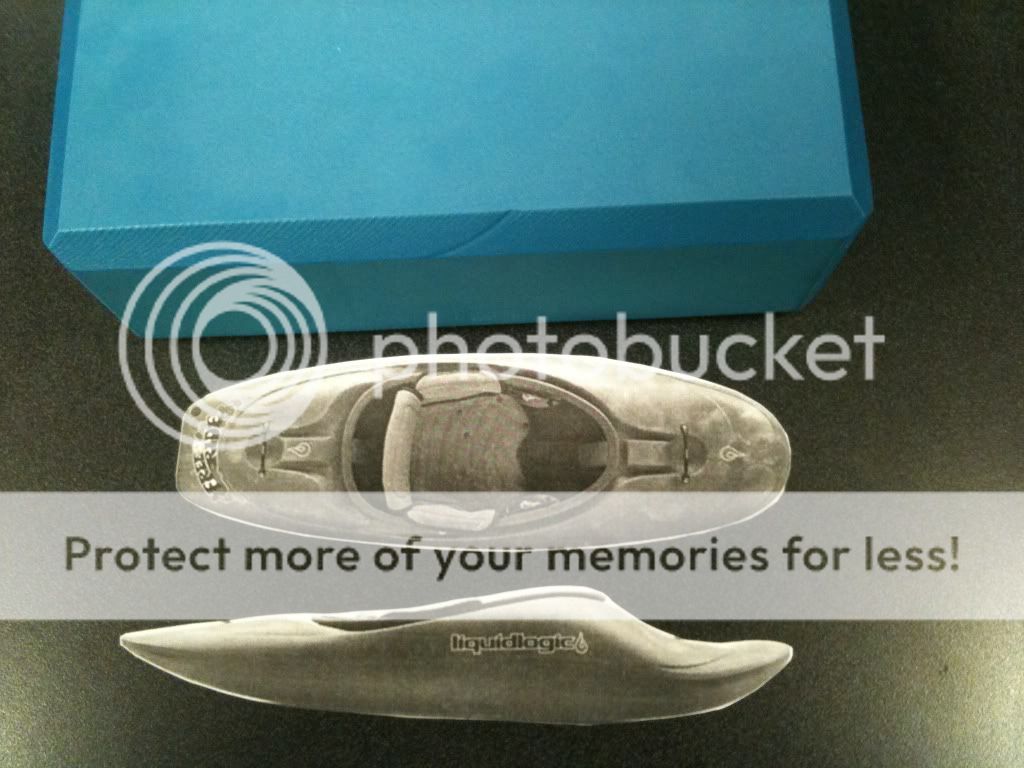
First we start off with a block of foam or wood. Since I couldn't find any basswood for a decent price around where I live, I opted to use foam. Specifically, I decided to use a foam yoga block. You can get them for relatively cheap, and probably make at least two complete foamies out of a single block.


For my design, I opted to go with the popular and super cool Liquidlogic Freeride. I want my foamie to look and behave like a playboat/river runner, so it's a perfect design. I simply found a side and top profile picture online and scaled it to the size I wanted, printed it, then cut them out to use as a basic guide for cutting the main form out of the foam block.


Then, I started cutting out the rough form!


This is where we are right now. I should be able to use a good sharp Xacto knife to do the carving and Dragon Skin to do the shaping. It'll take a day or two to get some Dragon Skin in, but it'll be worth the wait, it's the perfect stuff for shaping mini cell foam!
Next update, I'll go through the basic carving and shaping of the boat and the rider, then we'll start looking at paint, coating, and weight options! Stay tuned!

Wednesday, November 30, 2011

The Dark

Heading into winter, I've once again found myself busy but a bit bummed. This summer was pretty epic. Between buying a new house, photoggin', kayaking and rafting, it's been a blast. As the case for most people, it pretty much slows to a crawl once cold weather hits. I've got a bunch of cool weather paddling gear, but not quite cold weather/4 season gear, so from here on to around February it'll be limited to the occasional warm day here or there. The one good thing is that it lets me kind of reevaluate my gear needs for the next year and prepare for whatever adventures that are on the horizon. The other good thing is it gives me more time for some much needed mountain biking!

The next paddling season will be pretty interesting. I got Jess a boat at the very end of this season, so she hasn't had a chance to paddle it yet. That being said, the first part of the season will be spent getting her all lined out to paddle moving water and maybe even some Class II/III whitewater. She seems pretty receptive to the idea, so as long as I can keep from getting her in something over her head, I think she'll take to it pretty well. I keep assuring her it will be fine and that once she gets acclimated to moving water, the jitters will go away.

I'm hitting up the Immersion Research crew pretty soon for a new drytop in preparation for early spring Elkhorn and Big South Fork runs. I'll also be picking up a drysuit from them as well later on in the year in anticipation of getting into year round paddling and eventually (hopefully) a trip down the Grand Canyon in the near future.

For now, it's hunting season and my weekends are pretty much booked up until the end of the year. Once January hits though, it looks like I'll be hitting up the local mountain biking hotspots for some winter fun. The Kona is all tuned up and ready to go, time to hit the trails!

Saturday, September 17, 2011

My Review of Black Diamond Spot Headlamp

Originally submitted at REI

Updated for 2010, the Black Diamond Spot headlamp is brighter than before to punch a hole through darkness while you run, ski, climb, hike and paddle.


Excellent headlamp for the money.

By thelosthiker from Central Kentucky on 9/17/2011


5out of 5

Pros: Stable, Bright, Adjustable Beam

Cons: Not Waterproof

Best Uses: Day trip, Backpacking, Hiking, Car Camping

Describe Yourself: Professional/Guide

Was this a gift?: No

I've had a Black Diamond Night Ray for 7 years or so and it has functioned very well for me through the years. It still works and I still use it quite a bit, but I needed something a little brighter and a little more versatile. The Spot is just the ticket.
I can't really comment yet on the battery life since I'm still on my first set of batteries (the same ones that came with it). I have played around with it quite a bit though and have not noticed any lack of brightness yet, the battery meter is still on green as well. One thing in particular that I'm happy about, is the lack of a regulator. Some people like them, and in theory I'm sure they're great, but every light I've had that contained a regulator has either suffered from flickering or completely failed.
The red light mode is what I was really looking for in a new headlamp. I've gotten tired of blinding myself and my wife when crawling around the tent or truck when camping. The red light is also less obvious to the critters in the woods and doesn't blind me when I'm sorting through stuff in my treestand during hunting season.
The other light modes work very well and the dimming feature is pretty slick. The high output mode really surprised me. The beam was nice and even with no cold spots and had very good reach, it will definitely light up the woods! The low output or flood mode works as expected and puts out good light for work around camp.
The Spot appears to have pretty decent construction, but I'm a bit leery of the lack of weatherproofing. However, from most of the other reviews I've read from other users who have operated theirs in the rain and snow, it doesn't look like I have much to worry about. I will probably still wrap a little piece of electrical tape around the seam of the body and battery door when I know I'll be taking it out into a wet environment.
I will note that if you absolutely must have full weatherproofing, you can spring the extra 10 dollars and pick up the Storm. Had I known that when I bought this lamp, I would have probably picked up the Storm just to have that little bit of extra weatherproofing and the extra 25 lumens, but I'm not concerned enough about it now to go back. It goes well above and beyond my expectations for a $40 headlamp.

(legalese)

Wednesday, January 05, 2011

The Itch

About this time every year, I begin to get "the itch". Almost any outdoorsy person knows what I'm talking about, especially those that have desk jobs and have been stuffed indoors for most of the fall/winter. Of course there are those exceptions, the days where you say screw it and go on a hike or take a little ski vacation, but for many of us they are few and far between. My eyes are beginning to glaze over, I need to get outside soon.

So as it goes around this time of year, I'm eyeballing what I want to accomplish this year. I'm beginning to plan the activities I want to do, places I want to go, and of course...the gear I want/need to get. It's a sickness really, and when the receipts hit your hands, it becomes sickening sometimes just how much you are willing to spend on "recreation". On the roster for this year? A "new" boat (as in, possibly new or possibly used, either way it will be new to me), new PFD, new helmet, and a few other miscellaneous goodies.

I have vowed to get back out on the water more. I miss the river. I miss camping and backpacking. The particular boat I'm looking at will allow me to do all of those at the same time. I'm opting for the Liquid Logic Remix XP10, a crossover boat of sorts. Its hull is based off of the popular Jefe and Remix series creekboats and river runners that Liquid Logic has produced, but has a retractable skeg for flatwater paddling and a 4600ci rear drywell for gear storage. When a buddy of mine first began talking about them, the term he used was "hybrid" boat. I sort of cringed when I heard it because I've seen the bad side of many so-called hyrid boats, I've even helped recover a couple over the years that have tried to run class III+ water. I was imagining a Perception rec boat from BassProShops trying to go down the Big South Fork canyon. I was imagining a generic open top kayak with the stability of a wet log. I decided to look at the boats he was talking about anyways, just to see what he was talking about. Color me suprised when I look them over and realize they're pretty legit. Capable of packing a crapload of gear, capable of running up to and including Class IV water, and capable of paddling in a straight line on flatwater. I gotta get me one of these! One problem...

After getting all excited about being able to finally have one boat that allows me to do many of my favorite activities at once, there's one slight issue...we've picked this year to buy a house. Not a huge deal since between the tax money we'll receive back this year along with what we have saved up as well as whatever else we manage to save between now and then, we pretty much have it locked down. However, since the house shenanigans will probably go well into the summer, I'm looking to find other sources of income to fund my hobby and let my main job or source of income take care of the house and whatever else. Hopefully I'll be able to do some weekend work for the outfitters this winter and spring and maybe a few other odd jobs here and there. By April or May I should be packing a new boat around in the back of my truck and stowing it in our shed or garage. Also, with working outside a bit more on the weekends, hopefully I'll be several pounds lighter. Sounds like a winner to me, but who knows what will happen between now and then.

I figure if I want it bad enough, I'll make it happen. Obviously, the purchase of a house will take the main stage. I hate renting and I want a bigger place with more storage. My wife is excited as well, for the same reasons. It's going to happen this year even if we have to build it out of sticks and mud. Hopefully though, my great plan will work out and we can do both the house and new gear. Stay tuned.

In other news, it looks like my YouTube channel is gaining a little more popularity, mostly for the videos on my homemade alcohol stoves. That's another plus...with more popularity comes more income from adsense, so keep clicking, guys! I'm planning on making a few more videos soon, only this time around, they will be some new designs I'm trying with thicker aluminum (like the Venom stove mentioned a few posts below).

Wednesday, November 03, 2010

My Review of Marmot PreCip Rain Jacket - Men's

Originally submitted at REI

The tried and true PreCip® jacket from Marmot® has been updated with new style lines and improved PreCip coating.


Great Rain Jacket For The Money

By thelosthiker from Central Kentucky on 11/3/2010


4out of 5

Fit: Feels true to size

Sleeve Length: Feels true to length

Chest Size: Feels true to size

Pros: Waterproof, Durable, Comfortable, Lightweight

Best Uses: Casual Wear, Hiking and Camping, Wet Weather

Describe Yourself: Professional/Guide

Was this a gift?: No

I've had one of these for 4 years now and it hasn't let me down yet. For less than $100, you can't beat them. I've taken mine backpacking and hiking in some pretty rough conditions and it's came away unscathed. I've even used it as a light splash jacket while guiding on the river. It's light and packable enough to throw into a spare side pocket on a backpack or a drybag on your boat. It doesn't contain any sort of liner or insulation, but that's ok with me. If I need any sort of a liner or insulation, I just wear a fleece jacket under it, problem solved.

My only gripe is when wearing this jacket in a car on a rainy day, when sitting down and pressing your back against the seat, the semi porous nature of the jacket allows a bit of moisture to come through. It was never enough to be a huge issue, just annoying at times. They made this jacket to be semi porous to allow most moisture to escape or breathe. However, when something else (in my case, a car seat) presses against the outside, it can sometimes seep in. This in no way affects any of its ability to shed or repel water in normal situations, just a funny side effect of the design.

All the seams and DWR is still intact and working great, and I will probably purchase another one when this one wears out someday...but it'll be quite a few more years, mine still looks brand new!

(legalese)

Tuesday, September 07, 2010

Photoggin'

One of my many hobbies/interests/jobs is photography and it has begun to really take off as of late. My wife and I decided it would be a good activity for us to do together, so I got her a dslr for Christmas last year and it's kind of snowballed from there. We're now booking steady shoots on the weekends and the occasional shoot during the week when we're not at our day jobs. We have a few wedding shoots in the works, but most are either family or engagements.

My real passion still lies in outdoor photography, which has been reignited with our recent purchase...the widely renowned Canon 70-200mm f/4L. The f/2.8L is actually the more popular of the L-series 70-200's, but the f/4L is a great first step into the high-end lens market. It's not the fastest or the fanciest lens, but it's a pure workhorse of a lens for outdoor photography. It will work ok indoors as long as it's reasonably lit, but it really shines in the outdoor settings. It will work perfect for our first real foray into serious nature photography, giving us a better edge at getting the shots we dream about.

I'm itching/excited to get out this fall to get some shots of the Kentucky whitetail deer, turkeys, and maybe even a bear or two. We'll probably take a little trip to Cades Cove in TN as well, which is almost guaranteed to give us some good wildlife shots. We're serious enough about photography as it is, but we admittedly do not make enough time or take enough opportunities to get out and shoot the outdoors like we really want. We settled into a bit of a funk over the summer with being either worn out from our day jobs or other shoots, or it was too hot to even think about so much as going hiking, much less pack around a bag full of gear in 90+ temp and humidity.

Admittedly, we are a bit of fairweather photogs, which is something we need to work on. Some of the best shots can appear out of the crappiest situations. Neither me nor my wife are too thrilled about getting up at 5:30am to head out to a blind or treestand, but the potential to get some great shots is beginning to override our apathy. We think our recent purchase of some higher end glass will be the nudge we need to get out and really shoot like we need and want. It would be nice to have a few big prints made to hang on the walls and maybe peddle a few as well.
I guess we'll see what happens once the UPS truck gets here today with the goods, this weekend will be fun anyways. We'll have a couple days to get familiar with the new lens, which will be nice since we have a family shoot scheduled Saturday. Probably after that we will head into the woods and see what else we can come up with. Stay tuned, shots will be posted soon!

Friday, August 20, 2010

The Venom Alcohol Stove

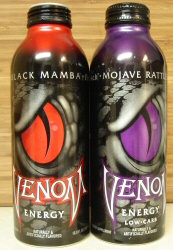
As many people know, I've been on an alcohol stove kick lately. My fascination in them lies with the fact that they're cheap and easy to make, plus who doesn't like anything having to do with fire? Anyhow, I was looking to do a little bit tougher stove out of some aluminum bottles that many beer and energy drink companies use. I wound up with a couple bottles of Venom energy drink. I would have rather had the aluminum bud light bottles to work with since I like beer a lot more than energy drinks, but I couldn't find any of the beer in aluminum bottles lately. I'm not really sure what's up with that, but the Venom bottles seem like they'll work pretty good.


The reason why I wanted to use the aluminum bottles like that is because they're thicker. As a result, they're a LOT tougher than a pop can stove. Now, I will say that there's nothing wrong with the pop can stoves. I've used the same one for several years without incident. However, as several backpackers have found out, they're not so receptive to being stepped on or handled roughly...enter the aluminum bottle stove. While I haven't done any scientific tests on any of them, the aluminum seems thick enough to withstand being jumped on and close to being ran over by a car without incident. I've discovered a way to make one that functions and is built basically the same as the traditional penny stove. They're a little bit harder to get the two pieces to fit together, but with a little coercion with a torch and some stretching of the outer piece, they will fit together quite nicely. I've got the pieces cut out now, so an update will be coming soon with the final pictures and any additional nuggets of info I might come across.

Here is a video basically showing what I'm talking about. However, since my cookpot is a bit bigger than the one he is using, I will be placing the jets on the very top.

Saturday, August 14, 2010

Homemade Alcohol Stoves

A couple years ago, I posted up a little video on YouTube that basically showcased a little alcohol stove I made for backpacking. It was a variant of the classic "pop-can" stove that is especially popular with thru-hikers due to their light weight, low rate of failure, and ease of construction. To make a basic penny-stove, it only takes maybe 10 minutes as long as you have a couple pop cans, a knife, and a sewing needle. Of course, to make a nice polished and shiny one or a double wall stove like in the videos below, it takes a little more time. Either way, if you're in a pinch and need a good little stove, the ability to make one of these little gems is definitely a good skill to have.
Here's the videos for now, but stay tuned over the next couple of days for new posts containing construction details. I've got a few little things I want to try out and I've enlisted the help of my little brother in-law to help, so it should be pretty fun.
The first video is the original I posted a few years ago, the second vid is a basic how-to for the same stove. I originally got the ideas and plans from zenstoves.net, but a lot of the links are dead now as many people have stopped contributing to the site or updating it. I want to give a little back to the alcohol stove community, so I'll try to post up a few different styles along with the basic instructions to build one for yourself. I am definitely not the only resource for these things, so get on google and search for them. There is a plethora of information out there, you just gotta dig it up. On to the videos....


Tuesday, August 03, 2010

Fun at The Farm


We finally managed to get out for a night of camping in what has seemed like forever. We've been wanting to take the truck up to the pond on the farm and camp for quite some time. Daniel messaged me on Saturday morning asking if we wanted to go camping somewhere, so we loaded everything up in the truck and set up camp next to the pond. It was also our first attempt at camping with our 10 month old beagle, Lucy.

We got everything set up before dark without any real issues other than realizing the rainfly for Jess's tent had mysteriously disappeared in the 3 or 4 years since its last use. We figured it was back at the house so we went without until a little later. We finally got everything set up and that's when Lucy began coming unglued.

We drove up earlier in the day to get some firewood ready and discovered most of the downed wood was a bit damp, but I took it anyways, I've never been unable to get a fire started and I wasn't about to go without one now. I also gathered up some smaller wood and kindling that was dry. I figured while it was burning and starting a good hot base of coals, it would dry out the bigger wood enough to burn. I managed to get the fire going enough on the little stuff that it was pretty warm and spitting flaming ashed off to the side, of course Lucy had to go after them. That was the first time she had ever been around a fire, she was a little freaked out but relatively fearless for the most part. She was even so bold as to try and pick up the cool end of a few logs and drag them out of the fire to chew on them. That didn't last long once she realized the other end was on fire.

Once Lucy got bored with the fire, she would not stop trying to jump on us. The bullfrogs had her freaked out the most, but she would do a complete 360 to investigate every little noise. To top that, the grass was too tall for her to be comfortable, so she wouldn't sit down. My tough little beagle is a bona-fide priss. Nothing like a fully trained rabbit dog you'd expect her to be. We had hoped she would take to camping relatively well/quickly, especially since she loves to travel, apparently she doesn't want to have anything to do with it.

Somewhere between the whining, jumping, and general chaos she exhibited, we opted to take her back to the house for the night and come back by ourselves. If anything, for peace and quiet. We picked up the rainfly for the tent while we were at the house since there was a small chance of rain, then headed back up to the campsite. By the time we got back up there, the fire had finally caught on the bigger logs, so I didn't have to fool with gathering any more kindling and finally got to relax. We sat around the fire for a few hours, roasted marshmallows and just took in the noises that come with the night.

We finally turned in for the night around 12, the crickets and bullfrogs quickly putting us to sleep. I figured we would probably get up around daybreak, but we wound up sleeping until almost 9am, when it finally got too hot and stuffy in the tent to be any sort of comfortable. We trudged around the campsite for a little bit then got everything packed back up and took off back down to the house.

It wasn't anything truly remarkable, but it was nice to get back outdoors for a night. I miss camping and we have made a vow to get out more, especially this fall once things cool off a bit. It's cheap and one of those things you can usually do pretty much on a whim, in fact it usually works out better that way. No reservations, no check-in/out times, I could get used to that again. I think it was Robert Burns who said it first, "The best plans of men and mice often go awry." Amen to that.

Monday, August 02, 2010

My Review of MSR Titan Tea Kettle

Originally submitted at REI

If you could carry only one pot on your next technical adventure this would be purist's choice.


A Minimalist's Dream

By thelosthiker from Central Kentucky on 8/2/2010


5out of 5

Pros: Durable, Lightweight, Compact, Easy To Clean, Stable

Cons: Pricey

Best Uses: Hiking, High Altitude, Backpacking, Car Camping

Describe Yourself: Professional/Guide

What Is Your Gear Style: Minimalist

Not too long ago, I was all about carrying a big cookset along with a big liquid fuel stove. It was basically enough to cook just about anything for a good size group. The problem? I hardly ever camp with more than one or two people, and usually if there are more, they have their own stove and cookset. That being said, I opted to significantly downsize my setup. Enter the MSR Titan Kettle...

I had a Blacklite Classic cookset from MSR, but it had a few issues. It was aluminum, which (the bottom)warped over high heat. It didn't really affect the overall performance, it was just annoying. It was nonstick, which was great but began flaking off and I usually only boil water so it wasn't really necessary for me. It was huge, way too big for anything I personally needed it for. I decided to sell it and buy the lonely little Titan Kettle. It was expensive for one piece of cookware, but it came highly recommended and I knew that the titanium was significantly tougher, so it would last for a very long while.

I mostly use my stove and kettle setup for adding boiling water to my dehydrated or freeze-dried food, so the Titan works perfect for me. It's just big enough to hold a few cups of water to heat up or boil for coffee, breakfast, or dinner for my wife and I while out on the trail or in camp. Three cups is about all it can handle (safely, without water pouring out, maybe 3/4" or so from the top), so there isn't any fuel or heat wasted on heating up dead space.

I now use the thru-hikers choice for a stove, a homemade pop-can stove (search for penny stove) that runs off of denatured alcohol or HEET, along with a custom pot/kettle support made out of two bicycle spokes and some aluminum tubing. It's the perfect size for the Titan Kettle and the stove is able to heat two cups of water to boiling in around 4 minutes (give or take 30 seconds or so depending on the ambient temperature). The best part is the stove, stand, fuel, and lighter all pack neatly away inside the kettle and I don't have to worry about scratching any of the nonstick off the inside(and consuming any errant flecks of nonstick later on). The lid kind of snaps on and stays put like it should, and it has a little pour spout to keep spillage and heat loss to a minimum.

I haven't had any issues with warping the bottom even when using this kettle with a higher output gas stove like a MSR Pocket Rocket or even the super high-output Dragonfly. The only thing is it's prone to getting a little dirty on the outside from soot and normal handling, but with a little cleaning it's fine. There's no coating to worry about coming off when you clean it, so if it bothers you, by all means, scrub it clean and buff it back up.

I've packed the Titan around in my pack and used it for a little over two years now and had zero issues with it. No dents, dings, warping, etc. It does what it was built for, and it does it very well. It's tough as nails and will probably outlast all of us.

The only thing that MSR could really do to improve the Titan Kettle, would be to make the handles a bit longer. The handles can get a bit hot when cooking since they're so close to the actual body of the kettle. That can be remedied by using gloves or a bandana, but it's a bit annoying. I may try to bend up some new longer handles out of some bicycle spokes.

The bottom line, to me it's worth the investment. It's a no frills kettle that does what it should and nothing more, nothing less. It's perfect for the minimalist and the best part is it fits perfectly into a Crown Royal bag for storage! (Not really to protect it, it doesn't need it, it just cuts down on the clanking against other stuff)

The funny part is I've never used it to brew tea...

(legalese)

My Review of Guyot Designs Squishy Bowl and Cup Set

Originally submitted at REI

Backpacker April '07 says these ingenious bowls will ''...mash into a tiny crevice of your pack; impervious to heat, cold, and hard knocks.''


Ok Travel Bowls

By thelosthiker from Central Kentucky on 8/2/2010


4out of 5

Pros: Lightweight, Compact, Durable

Cons: Pricey, Unstable, Difficult to Clean

Best Uses: Car Camping, Backpacking

Describe Yourself: Professional/Guide

What Is Your Gear Style: Minimalist

I decided a few years ago I would give these little guys a go, and I'm pretty much indifferent about them. They're pretty tough and super packable, but can be difficult to clean and not the most stable things in the world.

I use mine more at work fixing oatmeal for breakfast than I have for camping, but that's mostly because when I camp, we usually pack up freeze dried or dehydrated food in a couple bags or tupperware containers. We usually pour the hot water in the bags or containers and eat directly from them.

The theory behind the squishy bowls is great, but they could use a little improvement. They're a bit difficult to clean sometimes (especially in the woods), especially with sticky foods, sauces, etc...and there's no real way of just sealing them off with a lid or anything. They're a bit unstable when filled with hot food and trying to move around the campsite. It's extremely easy to grip them too hard and squish the food out of the top of them. I understand you have to make a bit of a trade-off to get the flexibility, but think if they were a hair stiffer, they would be a lot more stable and still just as packable.

I think part of what bugs me too is the price. I think they're just a tad too pricey for what they are and what they do. If they were closer to $10, then I might not feel so inclined to point out the flaws. They work ok and I probably would still recommend them to a friend, but I wouldn't really rave about them.

All that being said, I'll still continue to use mine and I may very well get another set if they're on clearance or something, if anything so we can have a set for me and a set for my wife. Until then, the big one is good for packing to work in my laptop case and fixing some oatmeal for breakfast, plus makes a pretty snazzy water bowl when camping with our beagle (Yes, I wash it between those two methods of use...thoroughly).

(legalese)

My Review of Chaco Z/2 Unaweep Sandals - Men's

Originally submitted at REI

Sporting a lightweight design and high-performance outsoles, Chaco Z/2 toe-thong sandals set a high standard of comfort.


Excellent Outdoor Sandal

By thelosthiker from Central Kentucky on 8/2/2010


5out of 5

Sizing: Feels true to size

Width: Feels true to width

Pros: Comfortable, Good Arch Support, Breathes Well, Durable

Cons: heavy

Best Uses: Casual Wear, Commercial Guiding, Watersports, Travel, Going Out

Describe Yourself: Casual

I've had my Z/2's for seven years and dread the day I have to give them up. The soles are just now starting to wear a bit thin, the straps are still in great condition though. I've guided for a whitewater outfitter for several years and I have used these sandals for every single trip. I've also wore them on countless backpacking and hiking trips. It's safe to say that I've put them through the wringer and they're still going strong.

When I first bought them, I was a bit apprehensive about the toe-loop. They took a bit of getting used to, but once I got the toe strap adjusted just right, I will never go back. They came highly suggested by other guides, so I decided to try them and I'm glad I did!

They are simply the most stable sandals you can work/play in, hands down. Yes there are other shoes out there that might a bit more stable, but they're just that...shoes. Shoes might offer a bit more protection as well, but they do not offer the freedom and breathability that the Z/2's do.

As with pretty much any sandal, I suggest you clean them every so often to keep them from stinking, but that's a given. Otherwise, they're the most breathable thing you can have on your feet while still protecting them. Many adventurers, guides, photographers, filmmakers, etc...use these, especially in wet and/or humid environments where shoes and socks become a problem to keep clean and dry.

They work great on land and in the water, with one exception...although it should be a given as well. They're not the greatest things to wear to the beach. Sand gets in the footbed, in the straps, and between the straps and your feet...leading to some serious abrasion if used for an extended amount of time in that environment. Once you get in the water though, chug them a few times and that will get most of the sand out. Occasionally you might want to pull the straps back and forth in the footbed and rinse them out as well.

I prefer to use these over hiking boots/shoes on most of my lighter trips although for trips with heavier loads, they do not offer the same support as a boot and were not designed to. As for sheer distance, I've never had a problem. Although to prevent chafing, you need to properly adjust them and have them broken in before taking any longer trips.

The only problem that I can really think of is for some people who aren't used to them, they can be a bit heavy. That's the tradeoff though for a super-tough pair of sandals that will take anything you can throw at them.

One of the big things that people (including myself) love about Chacos, is the ability to send the sandals back to have them resoled and/or restrapped in the event of a mishap or if they are simply worn out.

The bottom line, these are great sandals for casual all the way to commercial use and they look great in the process. The footbed is very supportive and will accommodate just about any foot given you pick the right size and width. Chaco's have an almost cult-like following and it's for good reason...they're tough as nails, comfortable, and the signature Z's they leave on your feet(tan-lines) are a huge bragging right!

(legalese)

My Review of MSR DragonFly Backpacking Stove

Originally submitted at REI

For the international backpacking gourmet, the multi-fuel MSR DragonFly stove has the most adjustable flame of any liquid fuel burning stove.


My favorite stove so far!

By thelosthiker from Central Kentucky on 8/2/2010


5out of 5

Pros: Stable, Lightweight, Easy to Light, Powerful, Easy To Clean, Great temperature control

Cons: Bulky

Best Uses: High Altitude, Car Camping, Hiking, Backpacking

Describe Yourself: Professional/Guide

What Is Your Gear Style: Minimalist

This is one of my favorite stoves of all time, although it does have some drawbacks...
I love the fine control over the flame and the ability to use pretty much any liquid fuel imaginable, which is a HUGE plus when camping in locations where specialized fuel and canisters are few and far between (overseas, long-range trips, etc). The stove is relatively easy to setup and take down, albeit a bit bulky compared to others. Some may not like having to refill the fuel bottles, but it's usually not a big deal, it comes with the territory. The varying sizes of fuel bottles available will accommodate pretty much any trip, whether it be a overnight, weekend, or week long expedition.

I have heard complaints that the jet will clog up from time to time, but I've only used white gas and kerosene and have had zero problems out of three years of use. With some "dirtier" fuels or fuels that you think might be a bit contaminated or dirty, most people expect that cleaning the jets will become necessary at some point in time. If the shaker mechanism doesn't clean it, it's usually easy to take apart and clean the jet yourself.

I wish the stove were a little easier to pack, but it's more of a basecamp style stove anyways, so if you're packing one around for an expedition or big adventure, you'll usually have a pot or cookset big enough to stick it in. It's great for car camping and basecamps and will do good for weekend trips...just not the easiest thing to pack for all the minimalists out there.

It works perfect for what I've needed it for, my only real gripe other than the bulk, is the noise. That being said, I was warned before I bought the stove, when you really have it cranked up beyond a simmer, it's a bit loud. The thing sounds like a jet engine, it's almost hilarious. However, it is a powerful stove that can boil water extremely quickly, but still able to simmer a stew or cook eggs for breakfast.

Although I think it would take a near hurricane to blow the flame out, it comes with a windshield/barrier that helps keep an even flame as well as facilitate quicker cooking times by reducing the amount of heat lost around the sides. The shield also seems to dampen the sound a bit, which is nice. It also includes a circular shield that goes under the stove with its main purpose being to reflect heat, but it also keeps the stove from scorching the ground underneath.

It seems to be a pretty economical stove to use as well. I have a small 8oz MSR fuel bottle and I've used it for several multi-day or weekend trips and haven't had to refill, and that's cooking breakfast and dinner for 2-3 days.

Bottom line, it's a great stove for bigger/longer trips with several people. Excellent for base-camps and car camping. Not so much for thru-hikers and fastpackers, but there's other stoves in MSR's lineup that are better suited for that style or method of travel. It's loud, but not to the point of being unbearable. Fuel is available pretty much anywhere. SUPER stable and quick to setup. Will operate in the coldest environments and at any altitude. For this style of stove, I highly recommend the Dragonfly!

PS: A few people have heard of the issues MSR had with their earlier fuel pumps breaking and have asked me if I've experienced any problems out of mine. I've never had any issues with mine and I think when MSR changed the design a bit a few years ago along with using a tougher material, they remedied any issues with breakage. Although with any plastic or composite material, extra care should be taken when being used in colder environments as the colder temperature causes it to become brittle and more susceptible to breakage/failure.

(legalese)